Join our next live webinar:
Creating digital certificates with Virtualbadge.io

Want to hire a designer to create a captivating certificate? How about we tell you that you can create a professional certificate in under 10 minutes yourself without spending a single buck? Read on to know how.


Using templates to create certificates is often frowned upon, and rightfully so. Because most templates fail to connect personally with your recipients and do not add up to your brand image.
But this is not a concern with Virtualbadge.io.
It provides an exhaustive list of templates to choose from. You then add your unique touch to the selected template to make it hyper-personalized. And not just certificate creation, Virtualbadge.io also lets you bulk upload recipients so you can forget about re-editing.
And yes - Virtualbadge.io has a solution to send your certificates across. It has a super-fast, one-click method to issue your created certificates.
Now let’s dive into the quick and easy six-step process to create a certificate from a certificate template with Virtualbadge.io.
Before you start designing, you need to have a Virtualbadge.io account. You can sign up for the 7-day free trial.
Once done, you are redirected to the main Dashboard, where you can start creating your certificate.
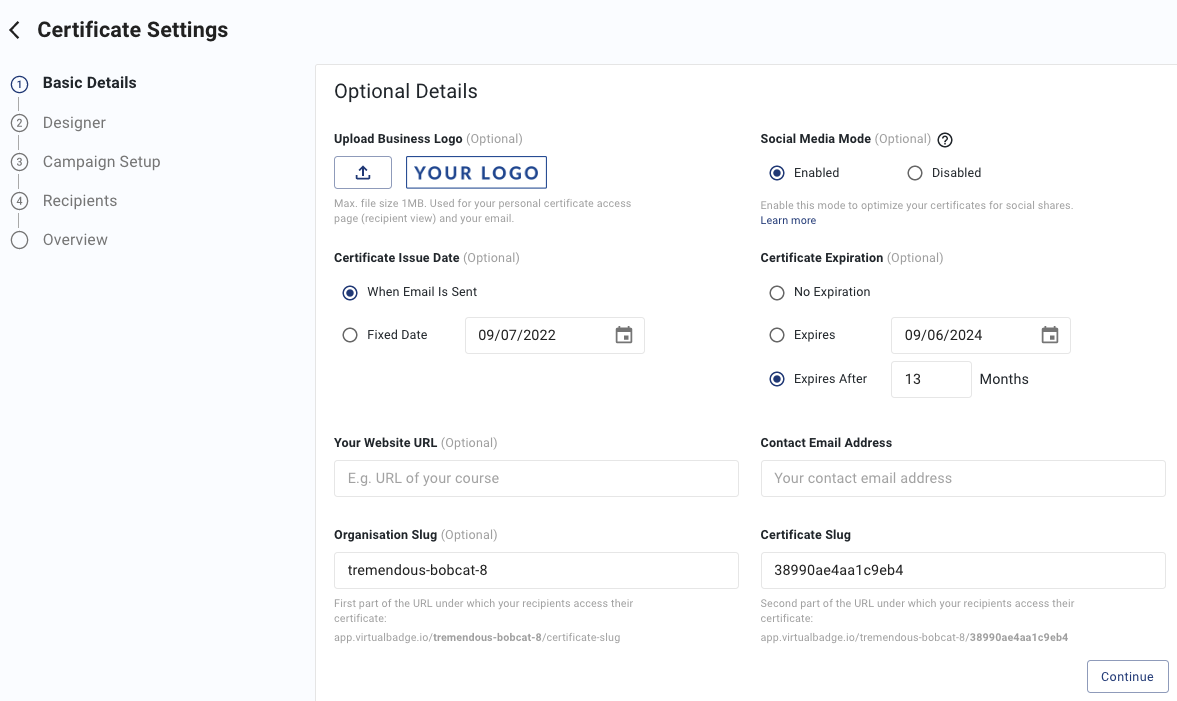
First, click on Create new Certificate to be redirected to your certificate setting page.
And enter or upload the below details for a seamless creation process:
Click on Continue to proceed.
You can design a certificate by choosing either a blank canvas or a template.
Choosing a blank canvas to design from scratch may sound attractive, but it is often time-consuming. So, we suggest you opt for the latter option.
Choose a pre-filled template that best suits your use case. Virtualbadge.io provides template recommendations based on orientation preference, with or without profile pictures, and certificate styles - light, dark, modern, or classic.

Choosing a template is crucial as it must highlight your brand and match the topic you're issuing the certificate for.
For example, certificates for webinars, non-professional courses, participations, etc., could have a profile picture with brighter colors. However, if you must create a certificate for authenticity or professional courses such as IT, Management, etc., choose one that’s minimalistic with softer colors.
Start editing your template with the required certificate attributes.
On the left pane of the design window, you have an entire section dedicated to adding new elements or choosing the existing ones to edit. Under Add Element, you can choose to add a new text field, an image, signature, shapes, and backgrounds.
Next, edit the recipient information - profile picture and full name.
And finally, you can see a list of existing certificate elements mentioned. Click on any specific element and edit its text, style, color, or position on the right pane.
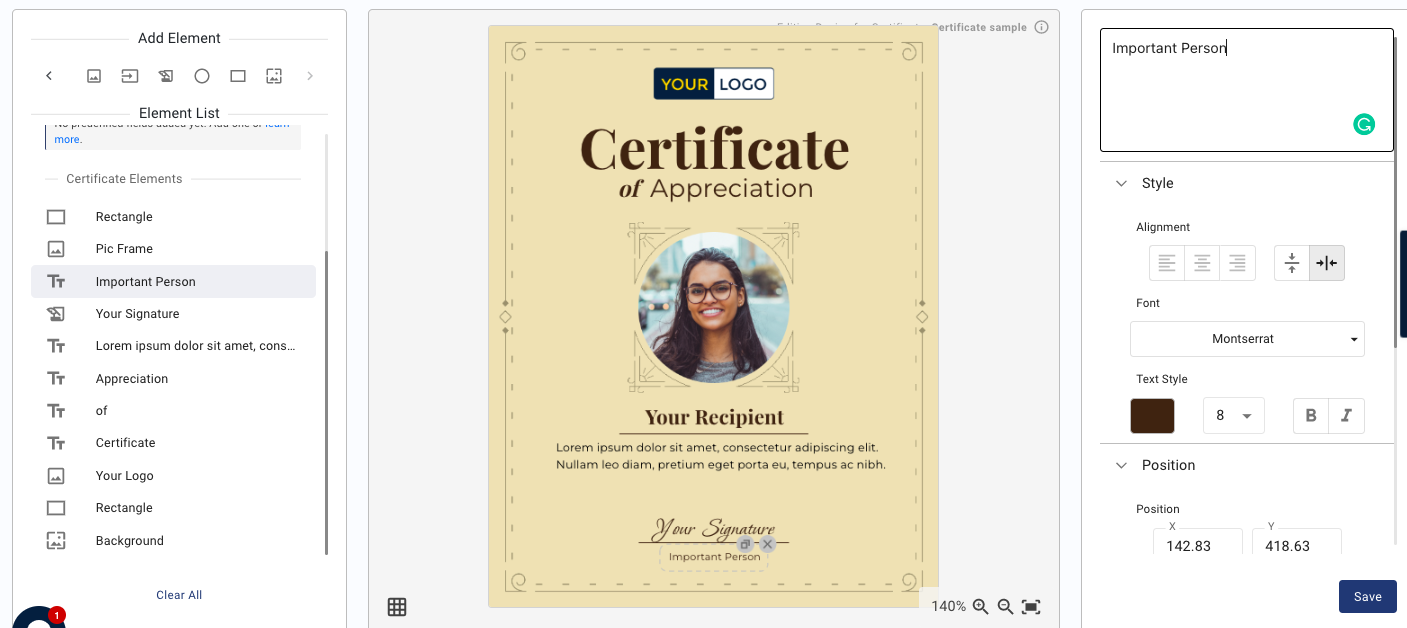
All done? Click on Save to finish editing. Remember, you can move back and forth between steps and customize as you wish.
Now that you have your certificate ready, it’s time to send them.
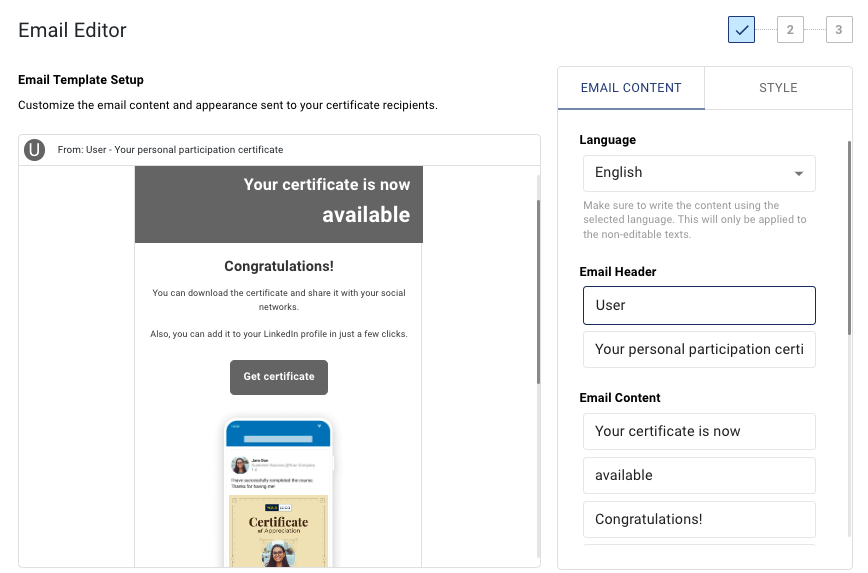
Issue your certificates in a jiffy with Virtualbadge.io. Set up a quick email campaign and customize the email content. In your third step under Certificate Settings, you can see a preview of the email your recipient receives.
On the right pane of the Email Editor window, edit the email content by customizing the messaging and email appearance under the style option. Each email is sent out to your recipients as an access email.
Want to automate this process? Virtualbadge.io offers Zapier integration. If you have a Pro account with Virtualbadge.io and a Zapier account, you can time your certificate issue and put the entire process on auto-pilot mode.
Once you’re happy with the email content’s outcome, click on Continue.
Optionally, you can create and customize a Twitter campaign for your certificates for more online visibility.
Add more authenticity to your certificate. You can add your organization's LinkedIn ID In the final campaign step. This enables your recipients to add these validated certificates to their profiles under the “Licenses and Certifications” section.
You can send your certificates in two easy steps:
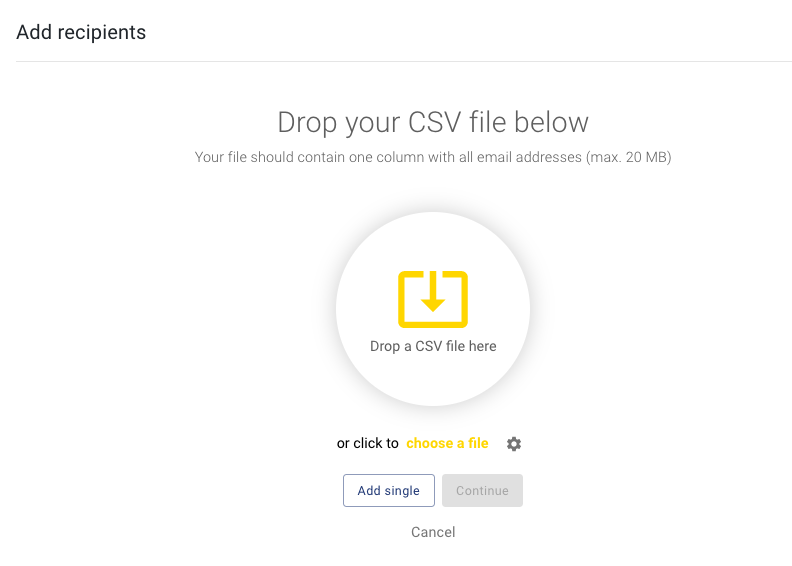
We suggest you use the CSV option if you have more than five recipients, saving time and effort. If you have under five recipients, you can always choose to add them manually.
Ensure you preview the data once the CSV file has been uploaded before you hit send.
Click on Continue to finish sending the emails.
Re-validate your uploaded or entered recipients list and click on Send emails.
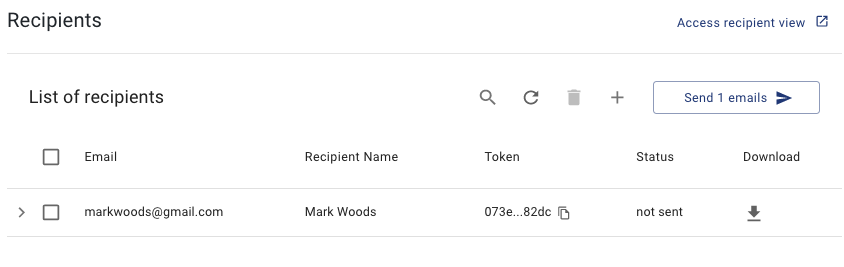
You did it! You created a certificate without the help of a professional designer AND sent them in bulk, all under 10 minutes.
And if you’re wondering about the safety of your issued certificates, don’t worry. Virtualbadge.io has got you covered.
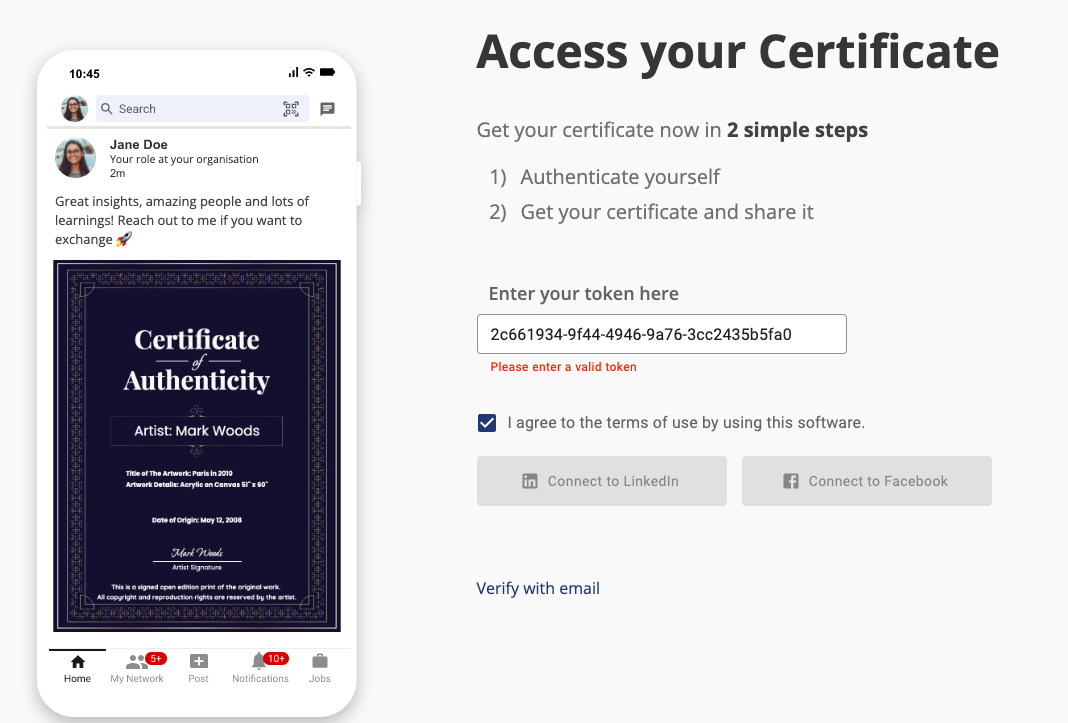
The Access email your recipient receives has a unique validation link to access the main certificate. By clicking the Get Certificate button on their email, they are automatically redirected to the Access your Certificate page.
Here, they can validate their identity with their email addresses and further enter an authentication code (emailed to them) to access and download the certificate.
Virtualbadge.io provides an incredible template library while letting you explore your creative side. You can explore more features and customize the template with a wide range of elements and add-ons.
Ultimately, you do not need a degree in designing or hire a developer to create and send your certificates at scale when you have a tool like Virtualbadge.io.
Start for free - Sign up for your 7-day free trial today!
* You can find the organisation ID in the URL when you access your LinkedIn Company page as an admin.


Content writter
Oct 6, 2022
5 min

Use Virtualbadge.io to design and send digital certificates that create trust - in less than 10 minutes.
START FOR FREE
%20(1).svg)
.png)

.jpg)
.jpg)